Interior design project template
Interior design project management is much more than choosing curtains that will work with the color of the walls and that couch in the center of the room. An interior designer has to execute many small and big processes, make countless decisions, resolve issues that arise during the process, and ensure that the finished results are in alignment with the client’s intent and requirements.
Besides many challenges interior designers face, a project’s organization is one of the most significant ones. In all honesty, a poor organization can easily overwhelm the skills, most experienced, and toughest interior designers. It might belittle and ruin all of the beautiful design ideas and concepts.
It’s time to confront this reality and acknowledge that successful interior design projects require proper organization. Implementing management tools and techniques takes the burden off an interior designer’s shoulders, leaving space for creativity.
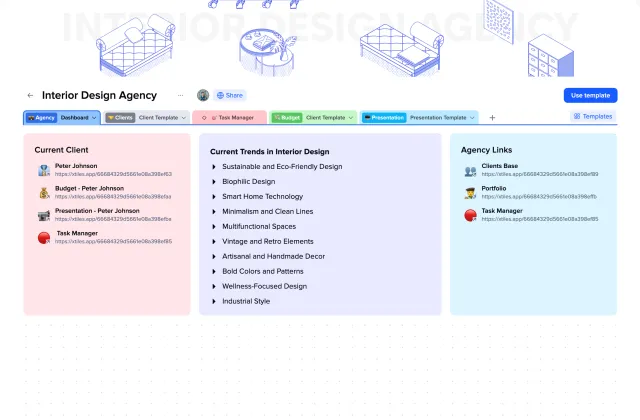
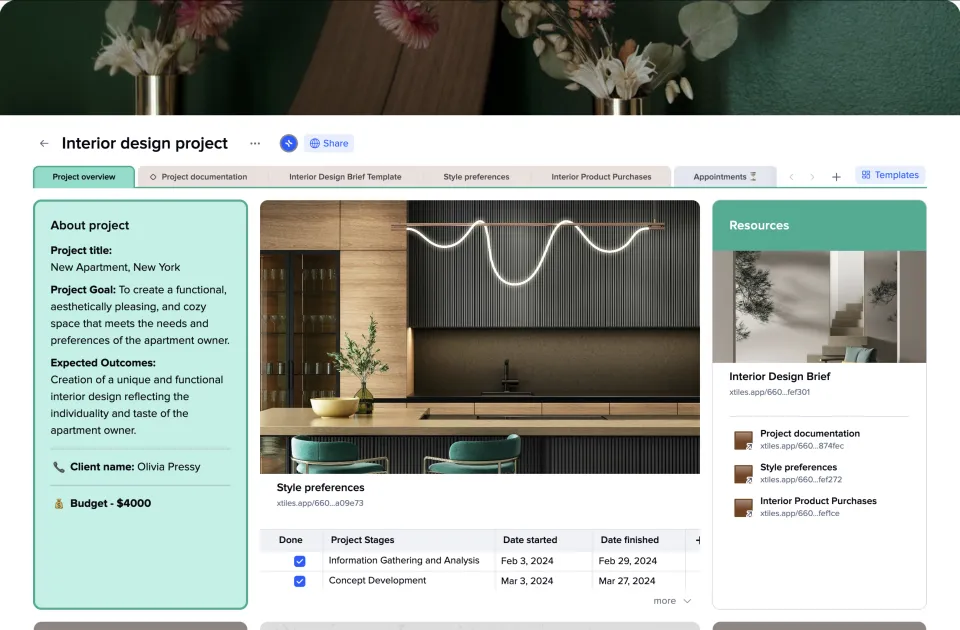
The xTiles Interior Design Project Template will help to cover various aspects of an interior design project, starting with gathering the needed information from your client, finishing with assigning tasks, creating the outlines of the future design, and creating shopping lists of necessary items. You may share it with your team and clients to ensure everyone is on the same page. Additionally, it will become a valuable resource for reflecting on your past achievements to embrace growth and create your exquisite easily-distinguishable design style.
Interior design project management involves keeping control over various interior design projects simultaneously to help designers and teams who work on implementing ideas encompass a diverse range of spaces and settings. For instance, an interior designer might be involved in a renovation of a smart apartment one week and then collaborate on designing a huge commercial office the following week.
Little or no interior designers limit themselves to work only with certain types of projects or clients. In today’s industry, they work with clients from different sectors, spanning various industries.
Interior design and project management might seem like two very different and non-compatible fields. However, it is not true. By combining these two, interior designers get the opportunity to plan and execute interior design projects effectively, with no missed deadlines, with little or no disagreements within a team, and with no overlooked details.
While each project presents its unique challenges and requirements, clients consistently expect high-quality and reliable outcomes delivered within specified timelines and budgets. A well-structured project management workflow is crucial in order to deliver beautiful projects on time, as it helps to organize tasks and monitor progress toward milestones, making the designer’s life much more manageable.
There is no one-size-fits-all project management workflow for interior designers because all projects are different, and each designer has their own style of work and management. However, professionals may use pre-designed interior design management templates to manage their projects efficiently.
An interior designer coordinates effective communication and ensures the seamless execution of the project. So, are they that different from a project manager?
Taking project management responsibilities is a part of being an interior designer and executing a project. Small projects can be handled with any special interior project management software or tools. However, for those that are large, require many people involved, and last for a long time, you may need to use all available means to ensure their success and smooth execution.
Project management means & interior design
Being an interior designer is not only about combining elements to create a great site to satisfy your clients but also about managing various clients and projects simultaneously.
When you have a well-defined set of goals and deliverables, it’s much easier to meet deadlines and keep track of every detail, even the smallest ones. Fortunately, project management software comes to the rescue by ensuring everything goes according to the initial plan.
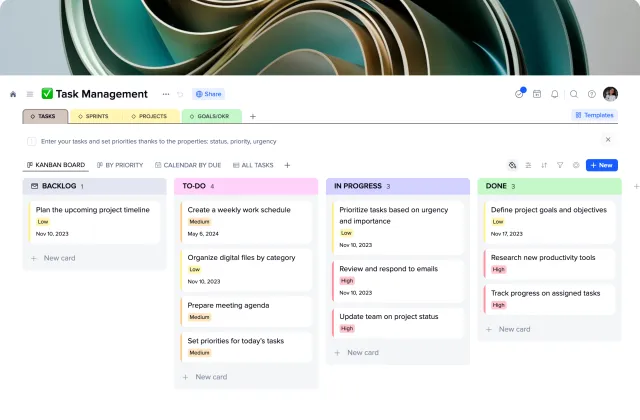
Whether you’re a solo interior designer or work on a team, utilizing project management tools, such as Kanban Boards, to-do lists, project management plans, etc., enables you to stay organized and keep a clear overview of your deadlines and deliverables.
What are the benefits of implementing project management into interior design?
What is your usual experience with orchestrating design projects? Millions of calls, millions of changes, and constant stress because people didn’t understand you correctly and missed something, and at the exact time you’re trying to make it on time to a meeting with your client or one of the vendors, you totally forgot about. Sound familiar?
Now, envision a world where your interior design project seamlessly progresses, resources are optimally utilized, and every detail is meticulously coordinated. Sounds great? That may become your reality if you make project management practices a part of your design.
Project management is a catalyst for clear communication among all stakeholders and nurturing a collaborative environment for any kind of project, and interior design projects are no different. Project management software and techniques have the power to end the days of confusion and disjointed efforts, providing every team member with the environment for working in harmony toward a common objective.
Project management practices protect teams and projects from potential risks. By proactively identifying and mitigating obstacles at the early stages or before they can become the neck of a bottle, you have enough time to prevent any disruptions that might have an effect on your project’s success. This approach proves invaluable in handling challenging clients and maintaining the smooth progress of your projects.
How to create an effective interior design project plan using the xTiles Interior Design Project Template?
Project managers follow a methodical and replicable approach to steer projects from their inception to successful completion. In the context of interior design, this structured process is referred to as the interior design project cycle.
While the specifics of the interior design project cycle might differ from one company or project manager to another, they all share common stages, objectives, and outcomes.
The interior design project cycle comprises a few distinct stages:
- Write a project overview
- Survey the space you’re going to renovate
- Develop your concept and ideas for the project
- Get all the needed stuff for your design
- Design development and implementation
- Finish your project
- Audit the outcome
1. Write a project overview
Writing a client brief revolves around understanding your client’s preferences, needs, what they dislike (this is important too so that you have a more defined guide on what is preferable and what to omit in your designs), and desired outcomes for their project.
Interior design is always deeply personal. That’s why sometimes it might be hard to get all the information from your clients. However, gaining insight into your client’s motivations is crucial for making informed design choices. Being an interior designer is always about being a bit of a psychologist.
During this initial phase, it’s essential to ask your client relevant and thoughtful questions to explore their vision for the finished space—understanding how they imagine the look and ambiance they want to achieve. You need to establish a connection with your client. Sometimes, it’s wiser to refuse the project if it doesn’t feel like something you can deliver.
The project overview serves as a catalyst for sparking your creativity and contemplating how you can transform your client’s aspirations into a tangible concept. Also, there are always quick answers whenever you’re in doubt.
However, it’s important to keep in mind that the ideas discussed during the initial client brief are not set in stone. They only provide a general understanding of your client’s preferences. The real refinement of these ideas takes place during the concept development stage.
The initial page of your project should contain a bit of everything regarding your project. Mention people responsible for different processes, a quick overview of your budget, the project’s timelines, and all the contact information you may need during the project.
Also, it may be helpful to gather links to the client’s preferred design styles and solutions, references, mood or design board, etc. If you share your interior design project management plan with your clients, there’s a big chance that they won’t go further than the first page, so it better be comprehensive.
2. Survey the space you’re going to renovate
A site survey involves analyzing your client’s existing space to gather essential information for the interior design project.
As a rule, this stage is typically conducted during the initial client briefing. However, there are instances when they may be deferred or when you may need to do it again. Or when you have to do it later because when you write a brief, the building is still under construction.
There are a few important steps to keep in mind when doing your field survey:
- Thoroughly explore every nook and cranny of the space, making note of any spontaneous thoughts or ideas that come to mind. They will be a valuable resource for later brainstorming, mentally taking you to visit the spare you’re renovating.
- Capture numerous photographs of the space to have a comprehensive visual reference. Additionally, to the photos, you may take a video to better understand how the site looks, how the light works in this certain space, etc.
- Take precise measurements of all relevant dimensions since they will be crucial for the design process. It may happen that there are measurements made by constructors or the owner. However, it’s better to do everything on your own to minimize the risk of mistakes.
- Request a copy of the as-built drawings if available, as they may reveal unexpected details or features.
3. Develop your concept and ideas for the project
Now that you have precise measurements, detailed notes, and a clear understanding of your client’s objectives, you can now refine your and your client’s raw ideas into something well-defined that has the potential to become an outstanding site.
During the concept development phase, draw inspiration from various sources, such as previous projects and interior design concepts, on platforms like Pinterest, Instagram, or Houzz. Generally speaking, any resource where you can get inspiration and new ideas is suitable. Every tool to supercharge your creativity is a good tool.
Remember, concept development is not just about getting a pile of photos of ideas you would like to implement in the space you’re renovating. It’s about compiling those ideas and design solutions and organically integrating them into the site you’re working on so that they align with your client’s specific needs, including features, finishes, furniture, colors, and overall tone/mood of the place they would like to see.
Discovering ideas worth pursuing can be a challenging process. Yet compiling them without turning them into a mess is an even bigger challenge. Techniques like creating a mood board or design board can be immensely helpful in narrowing down the styles, themes, and standout features that resonate with the project.
You may make a different document if you don’t like people checking your design board while you’re still working on them, using the xTiles Mood Board Template. Or you may have everything regarding your project gathered in one place using the xTiles Interior Design Project Template.
xTiles documents offer you easy drag-and-drop and wide customization options so that you can combine the elements whatever you want and as long as you need.
Once you have a few well-developed concepts, start fleshing out your scope of work and consider putting together interior design tasks to formalize the project’s direction and ensure a clear understanding between you and your client.
4. Get all the needed stuff for your design
Now comes the time to source and acquire materials, furnishings, equipment, and all other essential resources for the project. This stage often causes stress because it may be hard to find the exact piece of furniture or decor that you had in your mind when planning the interior. That’s why it’s important to choose items while checking their availability.
Sometimes, the whole project stops because you can’t find the needed paint for the walls. A well-executed procurement process ensures seamless progress, avoiding delays caused by unavailable or low-quality items.
The procurement stage is inseparable from the budget. Effective budget control and management ensures you deliver the outcome that your client is going to like within the budget you discussed earlier.
Talk with your client to find out if it will be okay to purchase second-hand items for decorating their building. That’s a great way to create a vintage vibe and save some money that can be used on items that require to be of high quality.
Benefits of Upgrading your xTiles Plan
- Access to advanced templates that make your planning, managing, tracking, and collecting a stunning visual experience.
- Unlimited personal spaces and pages to create and execute all of your projects, even the bravest ones.
- Unlimited spaces to share to work on group projects or manage teams.
- Recurring tasks to automate the planning process.
- Unlimited storage to save all of your information in one place.
- Google Calendar integration to manage your schedule from one place.
- Advanced color customization to enhance organization through custom palettes—because the visual aspect matters.
- A timeline view to visualize your projects and their approximate duration.
- Forms to gather data from anyone and save it to your collections.
- Linked pages to synchronize the information across multiple projects in real time.
- Priority support to get your answers anytime you need.